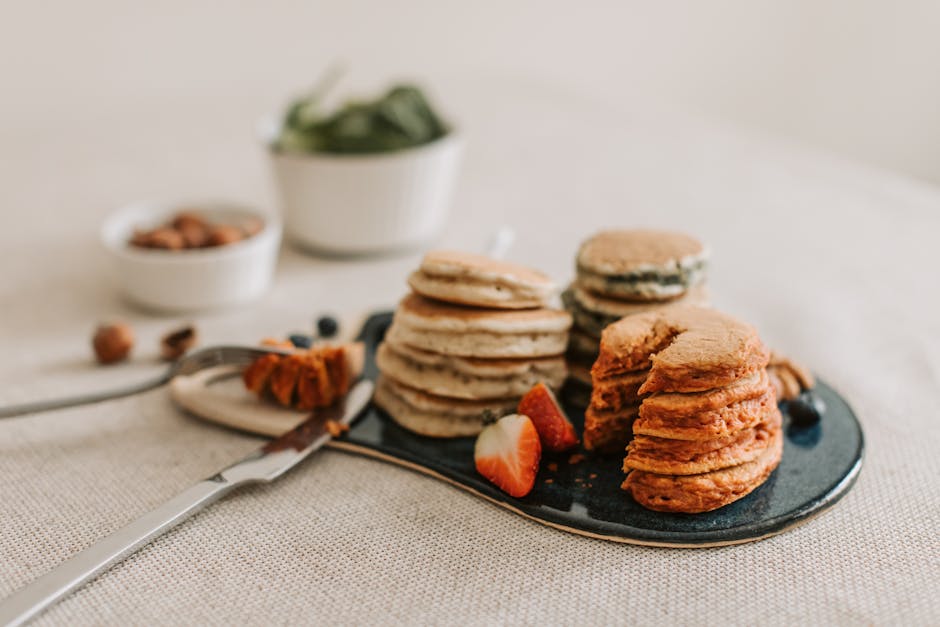
Embracing a gluten-free lifestyle doesn’t mean saying goodbye to delicious, satisfying sweets. In fact, it can be an exciting gateway to discovering new flavors, textures, and ingredients. Whether you’re baking for health needs or simply exploring, mastering the basics of gluten-free desserts opens up a world of possibility. This guide will walk you through the core principles, from understanding labels to stocking your pantry and perfecting your technique, so you can confidently create treats that everyone will love.
What Does ‘Gluten-Free’ Really Mean for Desserts?
Gluten is a group of proteins found in wheat, barley, and rye. In traditional baking, it’s the magic behind structure and elasticity. When flour is mixed with water, gluten forms a stretchy network that traps air, giving bread its chewy crumb and helping cakes rise. When we remove gluten, we must thoughtfully replace its structural role to avoid desserts that are crumbly, dense, or gummy.
For desserts to be truly gluten-free, every ingredient must be free from these grains. Hidden sources are common and can include malt flavoring (often from barley), certain baking powders (which may use wheat starch as an anti-caking agent), and even some vanilla extracts or chocolate chips processed in facilities that also handle wheat. This is why label vigilance is non-negotiable. For individuals with celiac disease or a severe sensitivity, cross-contamination is a serious concern. The most reliable way to ensure safety is to look for products with a **certified gluten-free label**, which indicates the item has been tested to meet strict standards, usually containing less than 20 parts per million of gluten.[^1] When searching for reliable **gluten free dessert recipes**, always start with verified, safe ingredients.
Essential Ingredients for Your Gluten-Free Pantry
Building a versatile gluten-free pantry is the first step to baking success. Instead of relying on one single flour, you’ll often use a combination to mimic the texture and flavor of all-purpose wheat flour.
**Flour Alternatives** offer unique benefits. **Almond flour**, made from finely ground almonds, adds richness, moisture, and a tender crumb, perfect for tea cakes and crusts. **Coconut flour** is highly absorbent and requires more eggs and liquid; it lends a subtle sweetness and is excellent in dense, moist treats. **Oat flour** (always ensure it’s certified gluten-free, as oats are often cross-contaminated) provides a familiar, hearty texture ideal for cookies and crumbles. For general baking, a pre-mixed **gluten-free all-purpose blend** is the most convenient starting point.
**Binders and Stabilizers** are the secret to structure. Since there’s no gluten to hold things together, ingredients like **xanthan gum** or **psyllium husk powder** are essential. They act as a glue, providing elasticity and preventing baked goods from crumbling. Eggs also play a crucial dual role as both a binder and a leavening agent, adding stability and lift.
**Natural Sweeteners and Flavor Enhancers** are your allies against dryness. Ingredients like mashed bananas, applesauce, nut butters, and high-quality cocoa powder not only add depth of flavor but also introduce much-needed moisture into batters and doughs.
Choosing the Right Gluten-Free Flour Blend
You have two main paths: store-bought blends or homemade mixes. Commercial blends, like those from King Arthur Baking or Bob’s Red Mill, are formulated for consistency and ease, often including xanthan gum. They are fantastic for beginners and work well in a wide range of **gluten free dessert recipes**. Homemade blends allow for customization. A simple blend of rice flour, potato starch, and tapioca starch can be a great all-purpose base. Remember, different blends perform differently: a starch-heavy blend makes tender cakes and pie crusts, while a blend with more whole-grain flour (like sorghum or brown rice flour) is better for heartier cookies and muffins.
Mastering Techniques for Perfect Texture
The right techniques are just as important as the right ingredients in gluten-free baking.
**The Art of Mixing:** Overmixing is a bigger enemy here than in traditional baking. Without gluten to develop, there’s no risk of toughness from mixing, but you can over-aerate batters or cause starches to break down. Mix your dry and wet ingredients just until combined for the most tender results.
**Managing Moisture:** Gluten-free flours, especially coconut and rice flour, tend to absorb more liquid and can lead to dry baked goods. Don’t be afraid to adjust recipes slightly. If a batter seems too thick or dry, add an extra tablespoon of milk, yogurt, or oil. Conversely, if it’s too runny, a bit more flour may be needed.
**Resting the Batter:** This is a game-changing tip. Allowing your batter or dough to rest for 20-30 minutes before baking gives the flours time to fully hydrate. This simple step leads to a better texture, reducing grittiness and improving the overall structure of your final dessert.
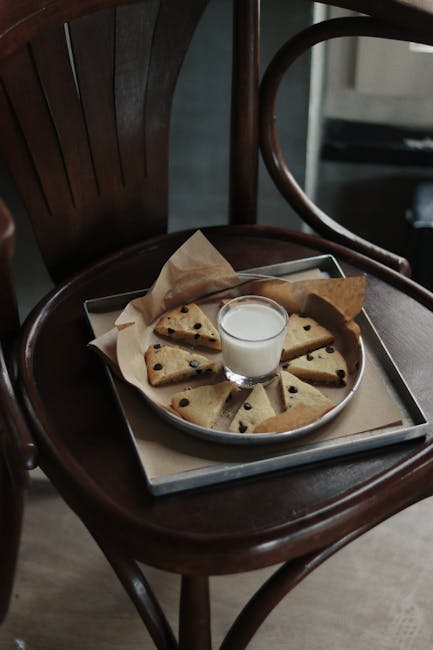
A Signature Recipe: Fudgy Gluten-Free Chocolate Brownies
This recipe puts all the principles into practice, yielding brownies with a crackly top and a deeply fudgy center. It uses a reliable gluten-free flour blend and highlights key techniques for success.
**Ingredients:**
* 1 cup (200g) granulated sugar
* 2 large eggs, at room temperature
* ½ cup (115g) unsalted butter, melted and cooled
* ⅓ cup (30g) high-quality cocoa powder
* ¼ tsp salt
* ½ cup (65g) gluten-free all-purpose flour blend (with xanthan gum)
* 1 cup (175g) semi-sweet chocolate chips (certified GF)
**Instructions:**
1. Preheat your oven to 350°F (175°C). Line an 8×8 inch baking pan with parchment paper.
2. In a medium bowl, whisk together the gluten-free flour blend and salt. Set aside.
3. In a large bowl, combine the sugar and eggs. Using a hand mixer or whisk vigorously by hand, beat for 1-2 minutes until the mixture is pale, thickened, and forms a “ribbon” when you lift the whisk. This step incorporates air for lift.
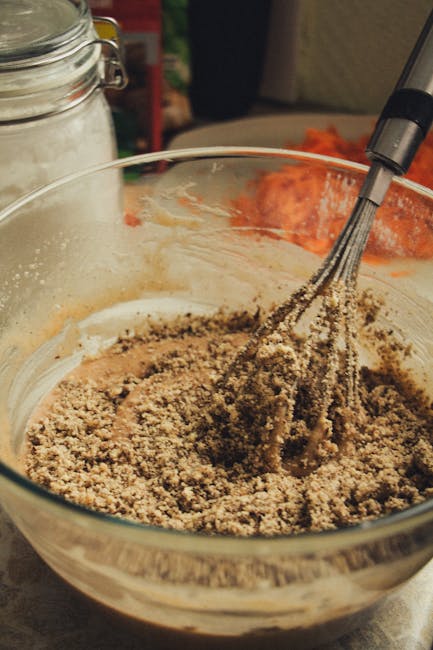
4. Gently whisk in the melted butter and cocoa powder until just smooth.
5. Fold the dry flour mixture into the wet ingredients using a spatula, mixing only until no dry streaks remain. Fold in the chocolate chips.
6. Pour the batter into the prepared pan and smooth the top. Let the batter rest for 20 minutes—this is the hydration step!
7. Bake for 20-25 minutes, until the edges are set and a toothpick inserted into the center comes out with a few moist crumbs (not wet batter).
8. Let cool completely in the pan before slicing. Store in an airtight container at room temperature for up to 3 days.
Troubleshooting Common Gluten-Free Dessert Issues
Even with the best planning, challenges can arise. Here’s how to solve them:
* **Crumbly Texture:** This usually indicates a lack of binding. Ensure you’re using a binder like xanthan gum (if your blend doesn’t include it) and don’t skimp on eggs or fat. Letting the baked good cool completely before cutting also helps it set.
* **Gummy or Dense Cakes:** Overmixing or using too much starch can cause gumminess. Measure your flour correctly (spoon and level, don’t scoop) and mix gently. Also, verify your baking powder is fresh and gluten-free.
* **Excessive Cookie Spreading:** If your cookies turn into puddles, your dough may be too warm. Chill it for at least 30 minutes before baking. Also, check that your gluten-free flour blend isn’t too low in protein; adding a tablespoon of almond flour can help.
Conclusion
Creating delightful gluten-free desserts is a learnable skill rooted in understanding ingredient functions and adapting your techniques. Remember to prioritize certified gluten-free ingredients for safety, embrace the role of binders and moisture-rich add-ins, and practice patience with steps like batter resting. Start with a trusted, simple recipe like the brownies above to build your confidence. With these basics in hand, you’re well on your way to mastering a whole repertoire of delicious, inclusive treats.

—
FAQs
**Can I just substitute regular all-purpose flour with a gluten-free blend in any recipe?**
Not directly in a 1:1 swap for all recipes. While many modern blends are designed for this, you may need to adjust liquid amounts or add a binder like xanthan gum. It’s best to start with recipes specifically developed as **gluten free dessert recipes** to understand how the flour behaves.
**Why do my gluten-free baked goods taste dry or gritty?**
Dryness often comes from flours that absorb more moisture. Try adding an extra egg yolk, a splash of milk, or ingredients like applesauce. Grittiness can mean the flour wasn’t fine enough or the batter didn’t rest. Letting the batter hydrate before baking significantly improves texture.
**Is xanthan gum absolutely necessary?**
For most baked goods that need structure—like cakes, bread, and cookies—yes, it’s highly recommended. For no-bake desserts, crisps, or some dense brownies, you might get by without it. Psyllium husk is a common alternative binder.
**How long do gluten-free desserts stay fresh?**
They often stale faster than wheat-based desserts due to different starch structures. Most are best consumed within 1-2 days. Store them in an airtight container at room temperature or freeze for longer storage.
**Are oats gluten-free?**
Oats are naturally gluten-free but are frequently contaminated during growing and processing. Only oats labeled “certified gluten-free” are safe for those with celiac disease or gluten intolerance.
—
References
*Disclaimer: This article is for informational purposes only and is not intended as medical advice. Individuals with celiac disease or severe gluten sensitivity should consult a healthcare professional and must verify the gluten-free status of all ingredients.*
[^1]: Celiac Disease Foundation. “What Should I Eat?” *Celiac Disease Foundation*, https://celiac.org/
* King Arthur Baking. “Gluten-Free Baking.” *King Arthur Baking*, https://www.kingarthurbaking.com/
* Academy of Nutrition and Dietetics. “Gluten Free Diets.” *EatRight.org*, https://www.eatright.org/
* Serious Eats. “The Food Lab’s Guide to Gluten-Free Baking.” *Serious Eats*, https://www.seriouseats.com/